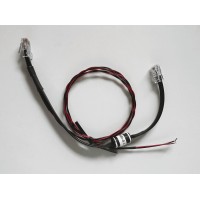
Oudie Cable Kit
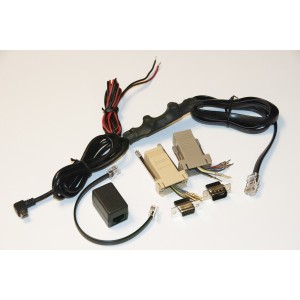
This is the 2nd generation Oudie cable kit. It is included in the box with the Oudie. It must be powered with 12V. The cable includes a circuit board with 12V to 5V power converter for powering the Oudie with 5V. It also includes an RS-232 signal level converter. It can also power the connected soaring instrument with 12V.
IMPORTANT NOTE:
- Oudie, Oudie2 and Oudie IGC "Ver Y" - Use Oudie Cable Kit
This cable kit is compatible with Oudie and Oudie2 units made before about October of 2019, and all Oudie IGC units. They display "Ver Y" in the About screen. They have a home screen with large SeeYou Mobile and ConnectMe icons - as shown in the image below.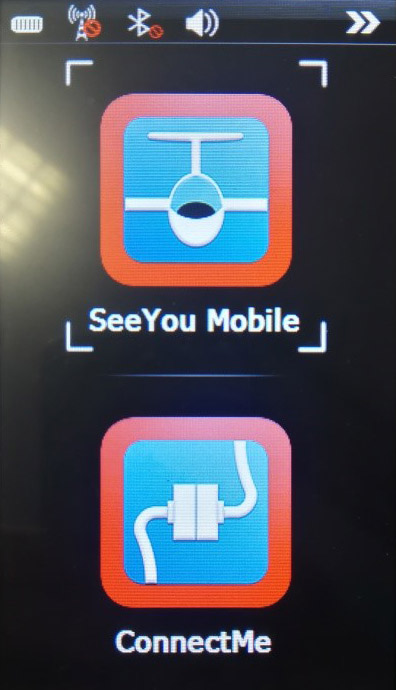
- Oudie2 "Ver R" - Use Oudie-Cable-Kit-R2
This cable kit is NOT compatible with new "Rev2", "Ver R" Oudie2 units which started shipping in about October of 2019. They have software serial numbers greater than 25xxx, 26xxx and 27xxx. They have a home screen that shows a large color image of an Oudie in front of clouds and "Click here to start" at the top of the screen and Language, Autorun, Calibrate, and USB icons on the bottom of the screen - as shown in the image below.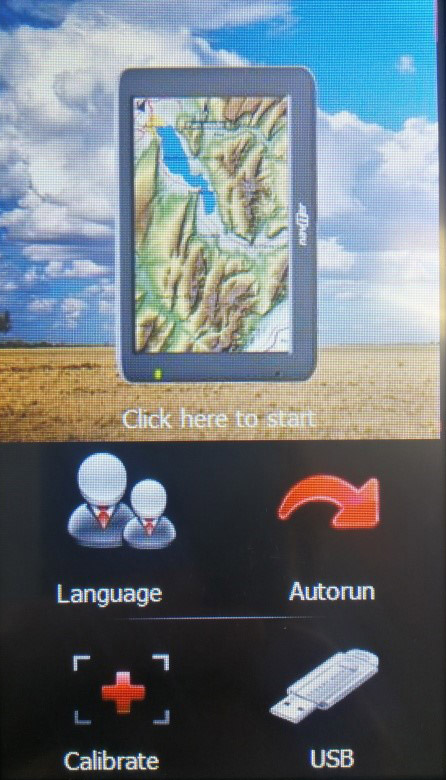
To check the hardware version of your Oudie, from the map screen, go to Menu, Next, About. The version should be displayed at the top of the screen. If it is not displayed, you should use the Naviter Updater to update your Oudie software to the latest version.
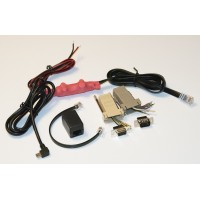
The Oudie Cable Kit includes:
- Oudie Power/data cable
Includes: 12 V power leads, mini-USB connector for Oudie, and RJ45 connector. The RJ45 connector can be connected directly to a FLARM or PowerFLARM unit or Volkslogger. This cable will provide the 12V power to the FLARM, PowerFLARM or Volkslogger. The pins connections are to the "IGC Standard".- RJ45 Wiring
- Pin 1 (red wire): +12V
- Pin 2 (blue wire): +12V
- Pin 3 (pink wire): not used
- Pin 4 (grey wire): not used
- Pin 5 (yellow wire): receive at Oudie
- Pin 6 (green wire): transmit from Oudie
- Pin 7 (brown wire): ground
- Pin 8 (white wire): ground
- RJ45 Wiring
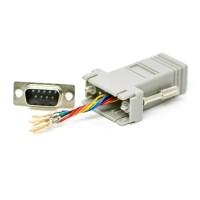
- Adapter, RJ45 to DB-9m
This is a configurable adapter that can be used to connect the Oudie Power/data cable to a variety of soaring instruments. Simply push the pins into the receptacles on the DB-9m connector and snap the connector into the housing.Important Note: Make sure the unused wires cannot short together. Cutting them off is not good enough. I recommend putting shrink tubing over the connectors on the unused pins. That way they can't short and will be available for future use.
- RJ45 to DB-9m Adapter Wiring
- White or Grey wire (1): +12V
- Brown wire (2): +12V
- Yellow wire (3): not used
- Green wire (4): not used
- Red wire (5): receive at Oudie
- Black wire (6): transmit from Oudie
- Orange wire (7): ground
- Blue wire (8): ground
- Connections for Cambridge 302 or GPS-NAV

Note: The 12V power leads on the cable must be powered. The 5V power from the 302 or GPS-NAV is not used.- Red wire > Pin 2 (GPS transmit, Oudie receive)
- Black wire > Pin 3 (GPS receive, Oudie transmit)
- Blue or Orange wire > Pin 5 (ground)
- Connections for PowerFLARM Core

Note: The Oudie power/data cable's RJ45 connector can be connected directly to the PowerFLARM Core. However, the RJ45 port will probably used for connection to the remote FLARM display.
Note: The 12V power leads on the Oudie power/data cable must be powered.- Red wire > Pin 2 (GPS transmit, Oudie receive)
- Black wire > Pin 3 (GPS receive, Oudie transmit)
- Orange wire > Pin 5 (ground)
- Brown wire > Pin 7 (+12V for powering the PowerFLARM Core - IMPORTANT: Provide power to the Core through either the RJ45 connector or the DB-9f connector - not both. If the Core is powered using the RJ45 port, do not connect this wire.)
Connections for LX160si or LX1600 or LX1606 or LX7007

Note: The 12V power leads on the cable must be powered. The 5V power from the LX160si or LX1600 or LX7007 is not used.- Red wire > Pin 3 (GPS transmit, Oudie receive)
- Black wire > Pin 4 (GPS receive, Oudie transmit)
- Orange wire > Pin 1 (ground)
- RJ45 to DB-9m Adapter Wiring
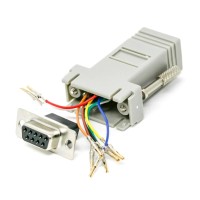
- Adapter, RJ45 to DB-9f
This is a configurable adapter that can be used to connect the Oudie Power/data cable to a variety of soaring instruments. Simply push the pins into the receptacles on the DB-9f connector and snap the connector into the housing.Important Note: Make sure the unused wires cannot short together. Cutting them off is not good enough. I recommend putting shrink tubing over the connectors on the unused pins. That way they can't short and will be available for future use.
- RJ45 to DB-9f Adapter Wiring
- White or Grey wire (1): +12V
- Brown wire (2): +12V
- Yellow wire (3): not used
- Green wire (4): not used
- Red wire (5): receive at Oudie
- Black wire (6): transmit from Oudie
- Orange wire (7): ground
- Blue wire (8): ground
- Connections to PC for use with Condor

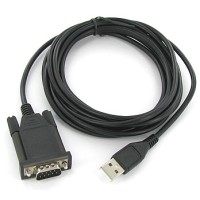
Note: The 12V power leads on the cable must be powered. Most current PCs don't have an RS-232 port, so a USB to serial adapter is required. I highly recommend the FTDI Chip USB Serial Adapter. Most others I've tried don't work.
Note: The Oudie also has a built-in Bluetooth radio, so it may be possible to connect it to a Bluetooth enabled PC without any cables.- Black wire > Pin 2 (PC Receive, Oudie transmit)
- Red wire > Pin 3 (PC Transmit, Oudie receive)
- Orange wire > Pin 5 (ground)
- Connections for LX5000 or LX7000 or DX50 (to wiring harness)

Note: The 12V power leads on the cable must be powered. The soaring instrument does not provide 5V power for the Oudie.- Red wire > Pin 3 (GPS transmit, Oudie receive)
- Black wire > Pin 2 (GPS receive, Oudie transmit)
- Orange wire > Pin 5 (ground)
- RJ45 to DB-9f Adapter Wiring
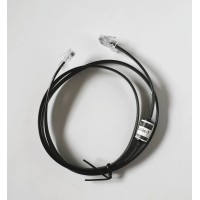
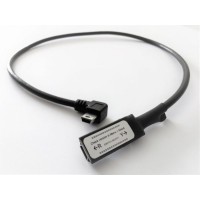
- 20 cm cable extension with RJ12 connectors and RJ45 Gender Changer
For connecting to LX Colibri, LX20/2000, MiniBox, RedBox
Naviter-Oudie-Cable-Kit
- Brand: Naviter
- Product Code: Naviter-Oudie-Cable-Kit
- Availability: In Stock
-
$80.00
Related Products
Goddard-Cable-CNv-Oudie
ClearNav CNv Variometer to Oudie Power/Data CableFor connecting a ClearNav CNv variometer to an Oudi..
$45.00
FTDI-Chip-USB-Serial-Adapter
FTDI Chip USB Serial AdapterThe FTDI Chip USB Serial Adapter ads an RS-232 serial port to any PC.&nb..
$35.00
Adapter-RJ45-DB9f
Adapter, RJ45 to DB-9fThis is a configurable adapter that can be used to connect the Oudie Power/dat..
$5.00
Adapter-RJ45-DB9m
Adapter, RJ45 to DB-9mThis is a configurable adapter that can be used to connect the Oudie Power/dat..
$5.00
Naviter-Oudie-Cable-Kit-R2
Oudie Cable Kit - R2The Oudie Cable Kit is included in the box with every new Oudie2 - starting in a..
$80.00
Naviter-Oudie-Cable-Ver-Converter
Oudie Cable Version Adapter - With switch - For using a version Y Oudie with a version R c..
$20.00
Naviter-Oudie-N-Case
Case for Oudie NThis is a high-quality padded case designed to protect your Oudie N when it is not i..
$30.00
Goddard-Cable-CNv-K6Bt-0p3
Goddard Cable, 0.3m, from ClearNav CNv vario serial port (RJ12, 6p6c) to K6 Bt (RJ45) with 12V power..
$65.00
Naviter-Cable-USBA-to-USBC-rt-angle
Cable, USB A to USB C, right-angle connectors at both ends, length: 1m..
$5.00
Naviter-Power-Adapter-USA-USB-A-USB-C
Power-Adapter-USA-USB-A-USB-C, USA Wall Plug, Input: 100 to 240 V, 50/60 Hz, Output: 3A..
$10.00

